

|
Posts Tagged ‘community supported agriculture’
Tuesday, July 28th, 2009

Are you finding bunches of fresh herbs in your CSA box? Parsley, sage, rosemary and thyme?
Hmmm, I wonder if Scarborough Fair was the first Farmer’s Market? If any of this rings a bell, you’re dating yourself to 60s crooners, Simon and Garfunkel. And maybe even feelin’ groovy. Without revealing age-specific details, I’m glad I experienced the 60s. As far as decades go, that was by far one of the best. Definitely much cooler than the 80s, wouldn’t you agree?
Bellbottoms and tie-dyes or mall-bangs and leg-warmers? Need I say more?
And the music? No comparison.
It would have been a better recipe segue for me if the lyrics had been parsley, dill, mint, rosemary and basil. Not nearly as melodic. Nonetheless, I find it quite romantic that the original love song was written long ago and involved a bonny lass, fresh herbs and a farmer’s market.
Only in Scotland.
I’m growing the rosemary and mint myself, but the rest of these herbs have been in my farm-share box the past several weeks. I can’t use them all, so I’m in the process of drying the more “dryable” herbs (a post on that will follow). The basil I have no problem using immediately. I love basil, the smell alone is enough to send me straight to the kitchen.
This recipe can be adjusted and played with in all kinds of ways. I’m having a love affair with pesto lately and am finding that you can create pesto using almost anything you find in your CSA box. Zucchini? Yes. Spinach? Yes. Garlic scapes? Wow! Onions, basil, parsley? No problem. Be creative. Here’s another one of my “launching pad” recipes to get you started.
basil mint pesto (and/or whatever else you want to throw in)
what you need
2 cups fresh basil leaves, washed and dried
1 cup fresh mint leaves, washed and dried
1/2 cup chopped walnuts *
3 cloves garlic *
1/2 cup good quality olive oil
juice of 1 small lemon
1/2 - 2/3 cup freshly grated asiago or parmesiano reggiano cheese (a hard Italian cheese)
sea salt and freshly ground pepper to taste
what you do
* The walnuts and garlic are wonderful if toasted first, but it’s not necessary. If you decide to try it, preheat the oven to 325F. Place walnuts on a cookie sheet and put them in the oven for 8 to 10 minutes, stirring once or twice, until golden brown (watch carefully as they burn fast). In the meantime, cut the ends off the garlic, but don’t peel it. Toast them in a small skillet on medium heat (on the stovetop). I have a small cast iron skillet that works great. Turn the cloves periodically so they cook on all sides, but don’t burn. The garlic should be somewhat soft and tender. Let cool and peel.
Put basil, mint, lemon, and half the oil in a food processor and pulse until well blended. Add garlic, walnuts, cheese and drizzle in the rest of the oil. Pulse until smooth. Add salt and pepper, pulse and adjust as needed (add a touch more oil if needed). It should be a past-like consistency.
You can also skip the mint and pulse in some shredded zucchini. Zucchini has a lot of moisture in it, so make sure you don’t end up with the pesto being too sloppy. You might have to cut back on the lemon or the oil. Serve on pasta, fresh roasted vegetables, toasted bread, as a side with fish or chicken or as a spread for sandwiches or veggie burritos. If you want to save some for later, put it in an ice-cube tray, freeze it and use individual servings as needed. This is a great way to have “fresh” pesto all year.
Feelin’ groovy,
Melissa
Sunday, July 26th, 2009

Although I did get a bunch of kale in last week’s Grant Farms CSA delivery, I’m getting the impression that zuchinni is about to become the new kale. Isn’t it about that time? When zucchini starts to push its way to the top of the food chain? Global veggie domination? Luckily I like zucchini. It’s a mild squash, moist and pleasant and quite easy to mix (or hide) in almost anything you cook or bake. Try adding some to pancakes or waffles, it’s seriously good. Plus, you won’t feel nearly as guilty eating pancakes floating in maple syrup if there’s a vegetable involved.
I made this bread several days ago and it was gone within 24 hours. As you might have guessed, it’s gluten-free, but my gluten-eating taste-testers absolutely loved it. So, those of you who have been inundated with zucchini and cherries, it’s time to make some breakfast bread. Or muffins. Or pancakes.
cherry zucchini bread (recipe adapted from a zucchini bread recipe from Pamela’s Products)
what you need
2 cups Pamela’s baking mix *
1 cup shredded zucchini (firmly packed)
1 cup pitted and chopped cherries
2 eggs
1/2 cup sugar *
1/4 cup coconut oil
2 teaspoons cinnamon
1 teaspoon vanilla
1 teaspoon orange zest (optional)
1/2 teaspoon salt
1/4 teaspoon nutmeg

what you do
In a medium-sized bowl, whisk together baking mix, cinnamon, salt and nutmeg. In a separate bowl, beat together eggs, oil and sugar for 1 minute on medium speed. Add vanilla and mix well. Blend dry ingredients into wet ingredients and gently stir in zucchini, cherries and orange zest. Fold into well-greased 8 x 4 inch loaf pan and bake in preheated 350 degree oven for about 1 hour or more, or until knife or toothpick inserted in center comes out clean. (Check after about 30 minutes – I had to cover the top loosely with foil because it was browning too quickly.) Cool for 5 minutes, remove bread from pan and place on cooling rack.
I ended up baking this for about 1 hour and 8 minutes, to be exact. I also used a glass pan. Adjust according to your oven and pan selection.
* I rarely use sugar in my baking. I prefer maple syrup, but these ingredients (zucchini and cherries) provided a very moist batter, so I didn’t want to add more liquid. I used organic raw cane sugar.
* If you use regular wheat flour, make sure you add leavening agents. The leavening agents in Pamela’s Baking Mix are equal to approximately 1 teaspoon baking powder and 1/4 teaspoon baking soda per cup. You might have to make some minor adjustments when substituting flours. Leave me a comment if you need more help with substitutions.

* For muffins, fill greased or paper-lined muffin cups 2/3rds full. Bake in preheated 350 degree oven for about 30 to 40 minutes.
zucchini nutrition profile and tips
• Low in calories; good source of fiber, vitamins A, C, B6, folate, iron, magnesium, potassium and protein.
• No need to peel, simply scrub clean.
• Store whole in the refrigerator for up to a week.
• Puree and store zucchini in airtight container in the freezer. This is a wonderful thickening base for soups and stews (without using flour). You can also freeze grated zucchini for later use in breads and muffins.
• Use chunks in kebobs along with other veggies or meats.
• Add slices to homemade pizza (yum).
• Use in spaghetti sauce, casseroles, lasagna or baked egg dishes.
• Grate raw on salads or use in breads, muffins, cakes, waffles or pancakes.
• Add chunks to soups and stew at the end of cooking.
• Use thin slices in sandwiches.
• Use small chopped zucchini chunks in egg, tuna or salmon salad.
• Cut in large chunks or slice whole zucchini in half, toss in a small amount of olive oil, place on a cookie sheet, season and grill in a preheated 400 degree oven until lightly brown. You can also do this on an outdoor grill.
• Hmmm? Zucchini ice cream, anyone? I’ll keep you posted. My beet ice cream was wonderful. So was my rhubarb sherbet, so I’m not making any judgments until I try it.
Joy, peace and zucchini!
Melissa
Saturday, July 25th, 2009
Go ahead honey, it’s gluten-free!
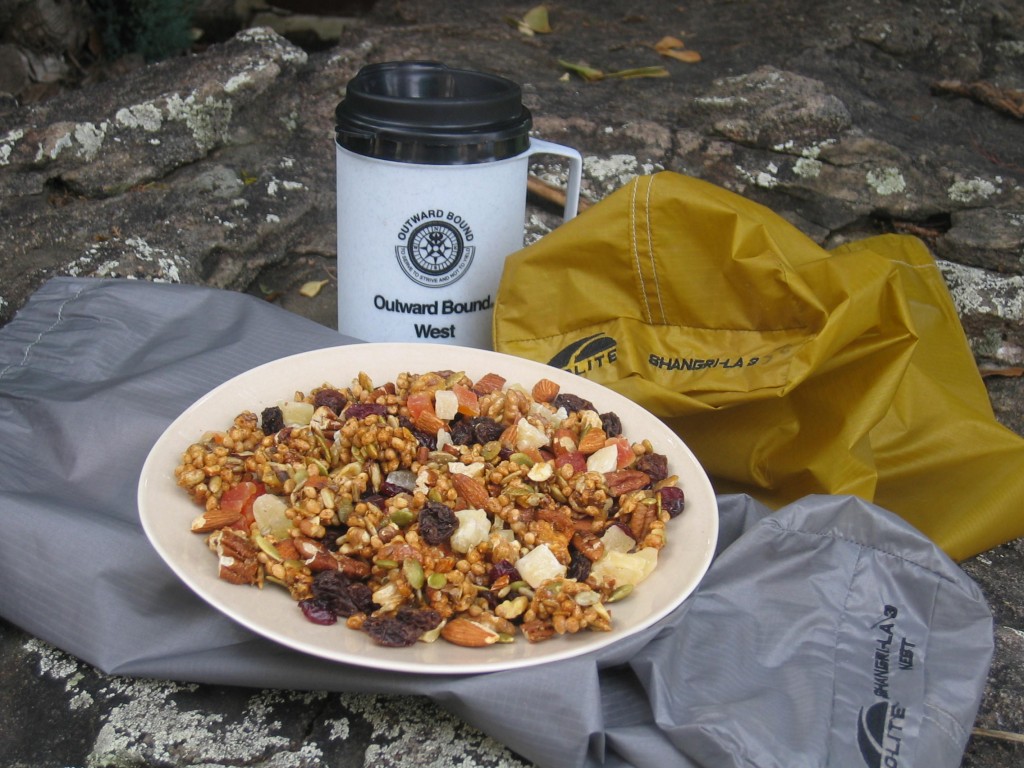
Health-promoting homeopath and fetching superhero-ette, Naomi, of Straight Into Bed Cakefree and Dried fame, is the creative spark behind the “Go Ahead Honey, It’s Gluten Free” recipe event. Every month it’s my intention to participate and every month I pout and stomp my feet (superhero style) when I realize I missed the deadline again. Shirley of Gluten-Free Easily is the event hostess this month and I know if I don’t get with it and participate, she’ll give me all kinds of gluten-free grief.
Plus, Shirley picked something that’s right up my alley (err, I mean trail) — gluten-free camp food. Last summer my son and I backpacked half the Colorado Trail (close to 250 miles) and I pre-made and dehydrated all our dinners, so this assignment is perfect for me. It’s also a great way to use up all my CSA kale and collard greens. I love the stuff, but my gosh, my hair’s turning green.
Unfortunately, most of my recipes are in my head, made up as I go, or scribbled on the back of bank statements. I’m not the most organized cook, that’s why I call half of my recipes “launching pad” creations. The two I’m featuring here are in that category. Adjust and change ingredients to your liking.
Melissa’s mile high trail mix
what you need
dry ingredients
1 box Perky’s Nutty Rice or Nutty Flax crunchy cereal
1 cup chopped walnuts
1 cup chopped pecans
1/2 cup chopped almonds
1/2 cup pumpkin seeds
1/2 cup sunflower seeds
wet ingredients
1/3 cup almond butter
1/3 cup maple syrup
1/3 cup honey or agave nectar
1 teaspoon vanilla
1 teaspoon cinnamon
1/4 teaspoon nutmeg
dash salt
coconut oil for greasing the pan
dried fruit *
* Gently blend in chunks of dried fruit after the mix has been cooked and cooled. I use a combination of unsulphured papaya, pineapple, mango, ginger, cranberries and/or raisins.
what you do
Preheat oven to 300 degrees. Use 2 racks placed in the middle of the oven. Place all dry ingredients in a large bowl and mix gently. Combine wet ingredients in a medium sized saucepan over low-medium heat; whisk/stir constantly until well blended and bubbly. Bring to a low boil for 1 minute, stirring continuously. Remove from heat and let cool for a few minutes. It will have a semi set-up texture.
Drizzle blended wet mixture over dry ingredients and stir gently until all of it has been mixed in. Spread out on 2 large, lightly greased cookie sheets and place one on each oven rack – unless you can get both cookie sheets on one rack in the middle of the oven. I just stack the two and use my convection setting, but a regular oven setting works just fine. Bake for 6 to 10 minutes, remove and gently stir (try to keep clustered bunches intact). Return to oven. If you are using two racks, switch the cookie sheets and alternate putting one on the top rack and one on the rack below. Continue baking for another 45 minutes or so; taking time to remove, check, and gently stir every 6 to 8 minutes. Alternate cookie sheet placement each time. Mixture should be a uniform golden brown color. Depending on your oven temperature, this should take a total about 40 to 60 minutes of bake time. Carefully watch how the mixture browns as oven temperatures vary and this stuff can burn quickly. Keep an eye on it. Don’t wander off and forget!
Cool completely. After the mixture has cooled, you can add the dried fruit. Store in airtight container in the refrigerator when not on the trail.
Garlic potato, kale and chicken backpacking soup
what you need
1 bunch kale
instant garlic mashed potatoes
instant chicken base
dried herbs of choice (parsley, sage, rosemary, thyme, mixed Italian herbs)
Wash, chop and dehydrate kale according to your dehydrator directions. Using a medium sized bowl, combine garlic mashed potatoes flakes, chicken base granules and dried kale. Add salt, fresh ground black pepper and dried herbs of choice; blend well and place in ziplock bags. I use one package of Hearthland Foods garlic mashed potatoes (4.5 ounces), 6 to 8 heaping teaspoons of Vogue Cuisine instant chicken broth base, one bunch of dehydrated kale, assorted dried herbs, sea salt and ground pepper to make 2 very large soup dinners for backpacking (or 4 smaller meals). This is a fast and nutritious meal while on the trail as all you need is boiling water. Shake some of the soup mix into your camp mug or bowl, add boiling water and stir gently. Adjust water depending on the consistency you want. I like it very thick and creamy, like a potato bisque. I’ve also dehydrated celery leaves and added those to the mix. Be creative and enjoy!


You might also like the Colorado Trail part 1, part 2 and part 3, or nutrition for the backcountry, or I see no good reason to act my age.
Go forth and be a happy camper!
Melissa
Wednesday, July 22nd, 2009
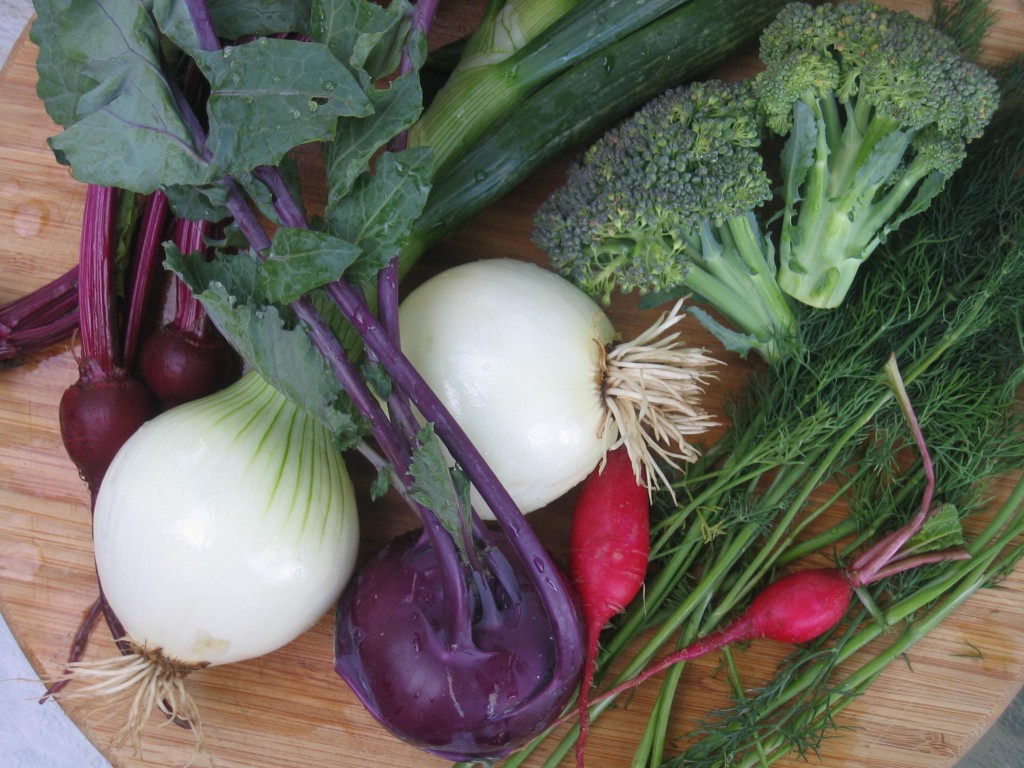
Whew, sometimes life takes over and blogging ends up slipping down the priority list faster than a sprint finish at the Tour de France.
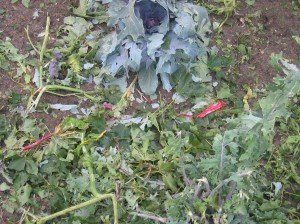
To make a long story short, I’ve been a bit overwhelmed lately (I’ll spare you the details), the last straw being the perfect storm that hit my area the night before last. I can’t imagine being a farmer and watching the wind and hail annihilate my crops; months of hard work reduced to shreds in a matter of minutes. My little garden was destroyed, large tree limbs broken, flower pots ruined and my car damaged by golf-ball sized hail. With each season that I’m a Grant Farms CSA shareholder, my respect for farmers and my appreciation for fresh, organic produce increases. The photo above is a small sampling of what I received in my CSA box on Monday. The photo below is of my garden Tuesday morning after the storm. I had about twenty vegetable plants, plus an assortment of herbs and flowers.
Everything is gone.
Such is life for a small-time, recreational gardener. In the grand scheme of things, it’s not a big deal. But, if my lively-hood hinged on extreme weather fluctuations and fragile plants, it would be devistating.
On another note, I can’t complain about my chard and cabbage when it could have been my house that was ruined (this one’s nearby). Check out the size of this tree; completely uprooted, crushing the house.
Spicy veggie curry with brown rice
(make rice according to directions and time it so both dishes are finished at the same time)
what you need
1 cup full-fat coconut milk
1/2 cup water or broth
1 and 1/2 tablespoon peanut butter (I used fresh-ground)
1 small onion, chopped
1 medium sized carrot, juilienned
1/2 cup zucchini, juilienned
1/2 cup peas
kohlrabi, peeled and juilienned (I used 1 small bulb)
1 cup cauliflower, washed and cut in small florets
1 cup broccoli, washed and trimmed
2 cloves garlic, minced
1 and 1/2 tablespoons curry powder (I used Hot Curry Powder from Penzeys Spices)
1/2 teaspoon of sea salt
coconut oil for sautéing
cilantro (if you have it)
These ingredients were what I had available from my CSA delivery, mix and match your veggies according to what you have on hand. Skip the peanut butter if you don’t want a “peanutty” taste and add whole roasted cashews instead (blend in at the end of cooking). This is a launching pad recipe, adjust to your liking.
what you do
Using a small amount of oil in a medium pot, sauté onions and garlic until tender. Add coconut milk and stir in curry powder and salt until all lumps dissolve. Add water or broth and peanut butter and continue stirring until well blended. Simmer and stir until you have the consistency you like. Add vegetables, cover and simmer until veggies are lightly cooked (just a few minutes). I added the peas at the end so they would remain crisp. Taste and adjust the seasonings (add more curry or salt). Serve over brown rice and top with a touch of cilantro.
For a detailed post on rice, check here.
I’m back — and thankful for fresh veggies and an intact roof over my head.
Melissa
Friday, July 10th, 2009
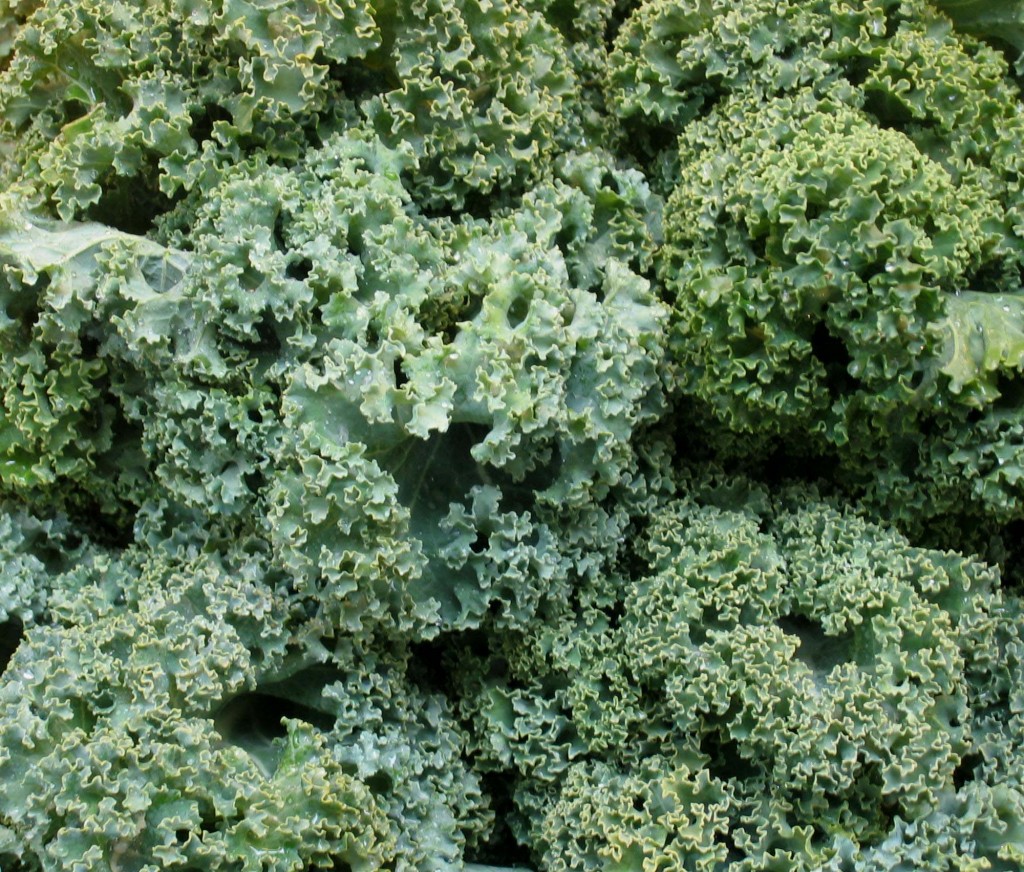
This is what the inside of my refrigerator looks like.
Okay, I’m exaggerating — I took this photo at my local organic market a couple of months ago. But I am busy trying to figure out what to do with all the beets and kale that have been spilling forth from my CSA box the last couple of weeks. Soup isn’t what comes to mind when it’s 85 degrees out, but Ali’s recent cream of mushroom version inspired me to break out the soup pot and simmer away.
sweet potato & kale soup
what you need
• 1 bunch kale, washed, dried and chopped (heavy stems removed)
• 4 cups chicken broth (homemade or 1 box Imagine organic chicken broth)
• 4 cups water
• 1 medium sweet potato, peeled and chopped into 1/2 inch cubes (I ended up with about 2 cups chopped)
• 1 can Eden Organic Pizza/Pasta Sauce (this tomato and herb sauce adds a perfect richness to the soup)
• 1 can white beans, cannellini or great northern
• 1 small onion, chopped (about 1/2 cup)
• 2 - 3 garlic cloves, minced
• sausage (I threw in 2 links of chicken sausage, chopped in medallion-type chunks)
• grated parmesan cheese
• salt and fresh ground pepper to taste
• oil for frying (I use coconut oil, use whatever your oil of choice is)
what you do
Heat 1 - 2 tablespoons of oil on medium heat in a good sized stock pot. Brown sausage, add onions and garlic and stir until tender. Add chicken broth, water and the can of Eden Pasta sauce. Stir well to blend ingredients. Add chopped sweet potatoes and simmer for 45 minutes or until potatoes are cooked. Add beans, kale and herbs and simmer for another 10 minutes or so. Kale should be cooked, but still have some “freshness” to it. I like to add greens at the end and simmer for a few minutes so they maintain some substance. Ladle into serving bowls and top with grated parmesan cheese.
Herb ideas — the Eden pizza/pasta sauce is a great addition to this soup and contains the perfect herb mix. I keep a couple of cans of this rich, thick, organic sauce on hand at all times. It’s a quick way to add depth and flavor to soups and stews. If you want, simply expand on that flavor combination with more of the same herb blend (oregano, thyme, basil).
You might also like:
beans and collard greens recipe
mineral-rich kale chips
poached eggs on kale
kale, chard and mushroom lasagna
Go forth and green up your life!
Melissa
Thursday, July 9th, 2009
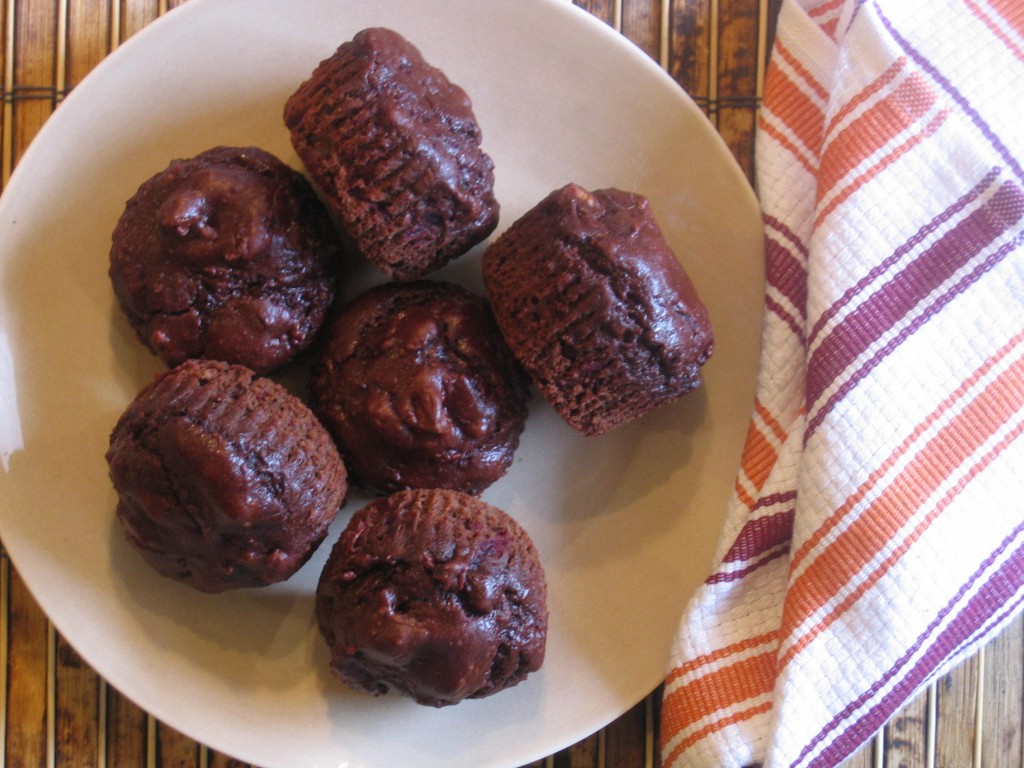
Those of you following this blog know I love beets. I always have, but this deadly serious vegetable is starting to push my beet-loving boundaries. Last spring I decided that planting my own small garden would be a great complement to my Grant Farms “small” CSA share. One quick blink later, I’m overwhelmed by beets, radishes and everything green.
I am was determined to eat all most of what I find in my veggie box and what I’ve grown in my garden. But I must admit, my late-spring exuberance is being overcome by roots, stems, leaves and bulbs. I’m still up for the challenge, but beware – my recipe development is showing the strain.
ruby red beet cupcakes
what you need
1-1/2 cup Pamela’s GF Baking Mix *
1 cup prepared beets (roasted and puréed) *
2 eggs
1/3 cup maple syrup
1/2 cup cocoa powder (I use NOW Foods, organic cocoa powder)
1/4 cup coconut oil (or butter or oil of choice)
1 teaspoon vanilla
what you do
Preheat oven to 350 degrees. Melt coconut oil — I put it in a heat-proof bowl and stick it in the oven for a couple of minutes as the oven is preheating (it only takes a minute or so). Blend together oil, eggs, vanilla and maple syrup. Add beets and mix well. In a medium sized bowl, stir together flour mix and cocoa powder. Add to wet ingredients and blend well. Spoon into greased or paper-lined muffin cups, 2/3rds full and bake for 18 to 22 minutes depending on your oven and your flour blend (gluten-free baked goods usually take a little longer; I baked these cupcakes for the full 22 minutes).
These dark chocolate, ruby red treats are delicious! Seriously good and no one would guess they’re made from beets.
Yield: 10 to 12 cupcakes
Options: add chopped nuts, chocolate chips, and/or top with frosting
* For more information on baking with gluten-free flours or how to substitute regular flour in this recipe, please check here.
* I’ve made these cupcakes with raw, grated beets and with roasted, puréed beets. I like the depth and moistness of the roasted version, but either way works fine.
You might also like –
Beet and spinach salad (instructions for roasting beets can be found here)
Beet ice cream
Beet greens and brown rice
Seasonal foods for July (general beet information)
The beet goes on (and on — and on),
Melissa
Sunday, July 5th, 2009

I’m not a huge radish fan, but I do like them mixed in with other veggies of similar consistency. This dish was a result of too many radishes, some extra kohlrabi and a desire to come up with a good traveling salad. I made a big batch of it a couple of days ago and have eaten it plain (as above), over lettuce, chopped up and added to egg salad and as a side dish to salmon and brown rice. I even brought a batch of it along on a hike yesterday. It’s versatile, easy to make, colorful and tasty. What more could you ask for in a veggie combo?
what you need (any variation is fine, this is a “launching pad” recipe)
2 - 3 carrots, washed and cut into match-stick pieces (click here for “how-to” video)
1/2 cup jicama, peeled and chopped
5 - 6 radishes, washed and chopped *
1 apple, washed and chopped
1 - 2 kohlrabi bulbs, trimmed, peeled and chopped
1 medium zucchini, washed and chopped
raisins
chopped parsley or mint
* My CSA delivery has included radishes the past 2 weeks. They’re Japanese radishes (or French breakfast radishes?) and are longer than the round version, making them perfect for matchstick salads.
what you do
Prepare your veggies of choice. Place in medium sized bowl and toss with dressing of choice. I used my default dressing and added some raisins, parsley and a touch of mint. The tea is chocolate mint tea, made sun-tea style. Yum!
default dressing
whisk together (store in glass jar and use as needed)
1 tablespoon lemon juice or apple cider vinegar
1 tablespoon Dijon mustard
1 tablespoon agave nectar
3 tablespoons extra virgin olive oil
ways to use your radishes
Radishes are great added to salads (garden salads, egg salad, potato salad or cold slaw) and are perfect in stir fries, soups and stews. They can also be sautéed in better or oil and served with sea salt, fresh ground pepper and herbs.
Go forth and match-stick your veggies.
Melissa
Wednesday, July 1st, 2009

If the beet is intense and deadly serious, the kohlrabi is off-beat and free-spirited. It’s the plant version of a 17 year old boy with a skull and crossbones tattoo on one arm and a skateboard under the other. Ahh, but I like colorful people and unconventional vegetables. Kohlrabi is included in that cast of characters.
Nutrition information and tips
Kohlrabi is a cross between a turnip and a cabbage and is a relative of broccoli. It’s high in vitamin C, low in calories, contains a good amount of fiber and serves up some calcium, potassium and iron. I’m not big on peeling my veggies, so other than trimming away the funky parts of the skin and the tough base end, I don’t bother (wash and scrub well). You can use both the globe part and the leaves, but it’s best to store them separately. The leaves don’t last long; use them quickly as you would any other green. The globe can be stored in the fridge for up to 3 weeks or more. Both have a mild, slightly sweet taste. You can eat it raw, sauté it, use it in stir fry recipes, or cook it and mash it.
Spinach (one cup) provides a whopping 1110% (no mistake, that’s thousand) of the daily value of vitamin K, 294% of vitamin A, 84% of manganese, 65% of folate and 35% of iron. It also has plenty of vitamin C, B2, calcium, potassium, B6, dietary fiber, protein and on and on. Even some omega 3 fatty acids. This is all packed into one cup of spinach, which carries with it a measly 41 calories. Lots of bang for your buck!
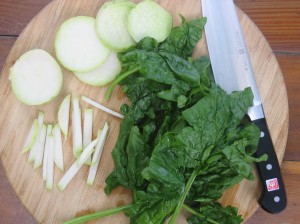
warm kohlrabi & spinach (salad?)
1 washed and scrubbed kohlrabi globe, chopped into strips
2 cups washed, dried and chopped spinach
roasted sunflower seeds
vegetable or chicken broth *
course sea salt and fresh ground pepper to taste
* I like keeping a small carton of chicken or vegetable broth in my fridge to use for sautéing veggies. Pacific Natural Foods has small (1 cup serving size each) 4-pack containers of organic broth, which lasts me 2-4 days.
Using a large skillet, heat about 1/4 - 1/2 cup of broth over medium heat. Add kohlrabi and simmer until semi-tender, 5-8 minutes or so. Add spinach and a splash more broth if needed, stir gently until spinach is slightly wilted. Transfer to a plate and sprinkle with sunflower seeds. Salt and pepper to taste. (This was my lunch, make a much larger amount for more servings.)
Caraway seeds also go well with this warm salad. I toast them in the pan before adding the other ingredients. I was thinking garlic scapes would be great with this, but I wanted to save mine for a salmon salad (I’ll post that recipe in a couple days).
Raw kohlrabi, carrot, jicama, apple and/or radishes cut in matchstick pieces makes a wonderful raw salad. Top with an olive oil/honey mustard dressing. You can also grate kohlrabi into any green salad or stir fry. Although it may look intimidating, it’s really quite friendly and versatile.
Go forth and embrace off-beat veggies!
Melissa
Tuesday, June 30th, 2009
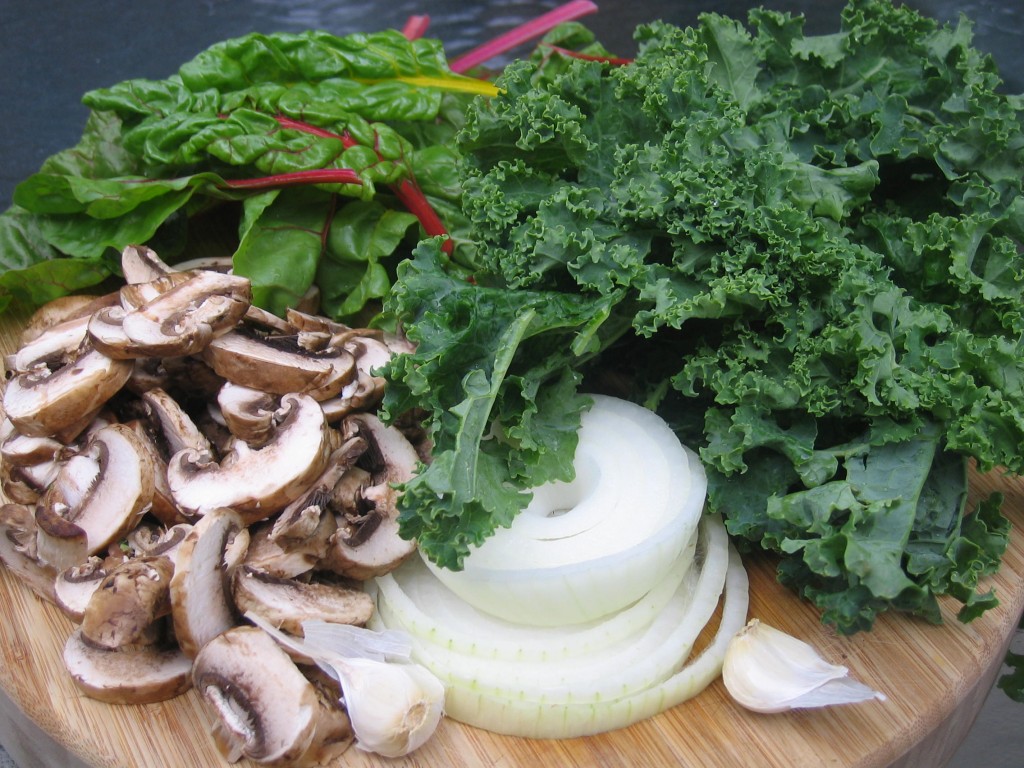
Those of us on the Farmer’s Market or CSA circuit here in the Rocky Mountains are being bombarded with seasonal greens right now. My goal is to eat everything – no waste, no carting stuff off to the compost pile.
I’m on a mission, but my gosh, these pesky greens aren’t making it easy. Plus, I got all caught up in the whole “victory garden” thing and had to plant a few of my own veggies and herbs.
What was I thinking?
First off, when you live a short distance from one of the best organic farms in the country, with farmers who’ve been growing fresh produce for decades, why would I want to bother with doing this myself? I have so little free time as it is and to spend it weeding and tending my nano-acre of produce seems silly. Having said that, I’m thoroughly enjoying my dozen or so plants, even though my lettuce bolted and my rhubarb got hail damage. I have more weeds than produce and something is snacking on my veggies when I’m not around.
This is a good lesson (well, sort of, the weeding part I could do without). I have a tendency to be very picky about what I eat and have a basic list of things I find important when choosing my food. Freshness, organically grown, seasonal, as local as possible (I do cheat though, my addiction to Fuji apples trumps all else). But I like knowing where my food comes from.
Whoa, all that’s well and good until I actually tried growing that food I’m so darn picky about. Please see my food pyramid remix list of healthy eating tips for details.
Bottom line? Growing organic food is not easy and wasting it is bad karma. But, discovering new ways to use farm-fresh ingredients can be a delightful, healthy and rewarding experience. From garlic scape pesto to dairy-free beet ice cream, I have a ball playing with my food. And to be honest, I’m thrilled to have someone else growing it for me. It’s also less expensive in the long run.
Now, on to those pesky greens.
One more thing (always), please keep in mind that most of my recipes are just plain my way of messing with food. I don’t follow rules well and I don’t measure things, so my recipes are guidelines. I make stuff up, so beware.
kale, chard and mushroom lasagna
what you need
4 cups washed, dried and chopped kale *
3-4 cups washed, dried and chopped chard (that’s how much I had in my garden)
2 cups mushrooms (I used 12 crimini mushrooms), washed and sliced
1 cup chopped onion
2-3 cloves minced garlic
1 package Tinkyada organic brown rice pasta (lasagna version)
8 ounces mozzarella cheese, grated
8 ounces ricotta cheese
shredded parmesan
1 jar (25.5 ounces) Muir Glen Organic Garden Vegetable Pasta Sauce
1 can Muir Glen Organic Chunky Tomato Sauce *
2-3 tablespoons of oil (I use coconut oil) for sautéing vegetables
salt and pepper to taste
what you do
Prepare pasta per directions, but cook a couple minutes less than indicated. Set aside. Heat oil in large skillet. Sauté onions and garlic for 2-3 minutes, add mushrooms, stir gently for another couple of minutes. Add greens and stir until partially wilted (it doesn’t take long). Remove from heat.
Spread a small amount (maybe 1/3) of sauce into an ungreased baking dish (I used a large round dish, but a 11 x 7 x 2 size is typical). Layer half the lasagna noodles on the sauce and add a little more sauce. Spread the vegetable mixture over the sauce and top with dollops of ricotta, half the mozzerrela and some shredded parmasean. Add another layer of noodles and the rest of the sauce. Top with dollops of ricotta, the rest of the shredded mozerello and parmesan cheese.
Cover and bake in preheated 350 degree oven for 30-40 minutes. Remove foil for last 10 minutes or so to brown the cheese. Keep and eye on it so it doesn’t burn.
Let sit for a few minutes to settle. This was absolutely delicious!
* You can use all kale or a mixture of any hearty greens (chard, spinach). They cook down quite a bit, so 7 or 8 cups of prepared greens really isn’t that much.
* I mixed in the extra can of tomato sauce with the pasta sauce because I was afraid the one 25 ounce jar wouldn’t be enough and I was right.
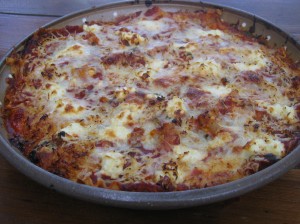 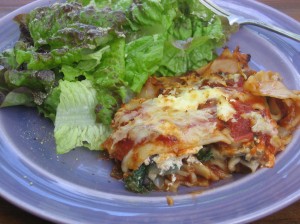
Go forth and eat your greens! And hug a farmer.
Melissa
P.S. Stay tuned for a rhubarb recipe and another garlic scape creation.
Friday, June 26th, 2009
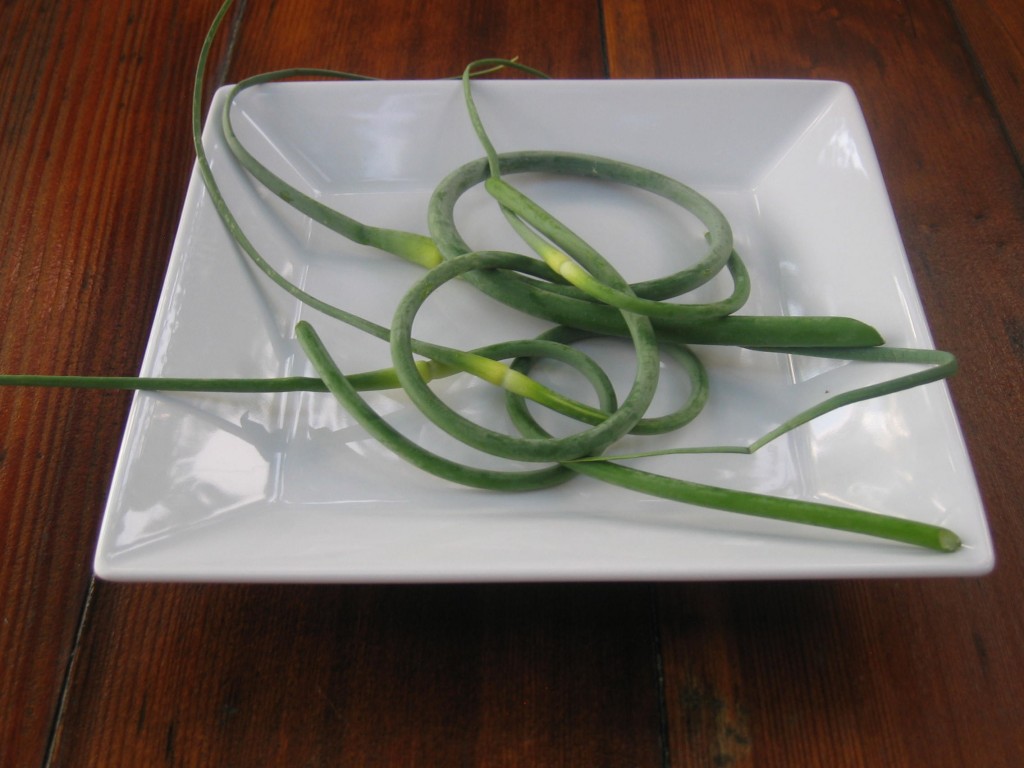
Were you wondering what those curly-cue things were in your CSA box this week?
Garlic scapes are an early summer treat and disappear quickly. Enjoy them while you can. They’re the bright green, coiled, twisty, flowering stalk that launches forth from a garlic plant. Although you can use them in everything from salads to stir-fries to omelets, the mainstay garlic scape recipe is a pesto. Dorie Greenspan has a wonderful post using almonds in the mix, but most recipes fall back on the typical pine nut and olive oil combination, which is what I’ve done.
garlic scape pesto
what you need
10 to 12 garlic scapes, washed and finely chopped
juice of 1 small lemon
2/3 cup grated asiago or parmesiano reggiano (a nice hard Italian cheese)
1/3 cup pine nuts
3/4 to 1 cup extra-virgin olive oil
course ground sea salt
what you do
Put the garlic scapes, lemon, pine nuts, half the cheese and half the oil in a food processor, blend well. Add the rest of the oil and cheese (to taste) and continue processing. Taste and adjust as you like, season with the salt. Serve with pasta or over thick crackers or bread (all gluten-free in my case).
If you only have a few garlic scapes, adjust the recipe to accommodate what you have.
Yum . . . Melissa
Disclaimer: All material on this website is provided for informational and educational use only and
should not be used for diagnostic purposes. Consult with your physician regarding any health or medical concerns you may have.
|
|


